Still in Beta testing with some customers, but 6connect’s API Conductor Platform (ACP) is coming out in 2017. Initially billed as an add-on to ProVision to ease DevOps integration tasks, ACP is poised to make integration and workflow development faster and easier for teams with support for multiple cloud platforms.
To start, we built a new UI for 6connect ACP to bring more visual tools to our DevOps user base. Feedback from the field showed that the ProVision API was powerful and easy to get started, but still required scripting to do more complex workflows that didn’t ship with ProVision.
ACP aims to provide functionality that is both useful to new ProVision users and experienced ProVision Admins. It allows for easy sharing (export and import) of workflows for maximum portability and makes consumption and creation of API endpoints.
So let’s dive in!
Once you have logged in with your ProVision User ID, your next step is to add Connectors. This just tells ACP what API data sources you want to use in the GUI so we know which API libraries to make accessible. Currently we support ProVision (and all associated Connectors) along with Amazon Web Services, Microsoft Azure and Google Cloud platforms.
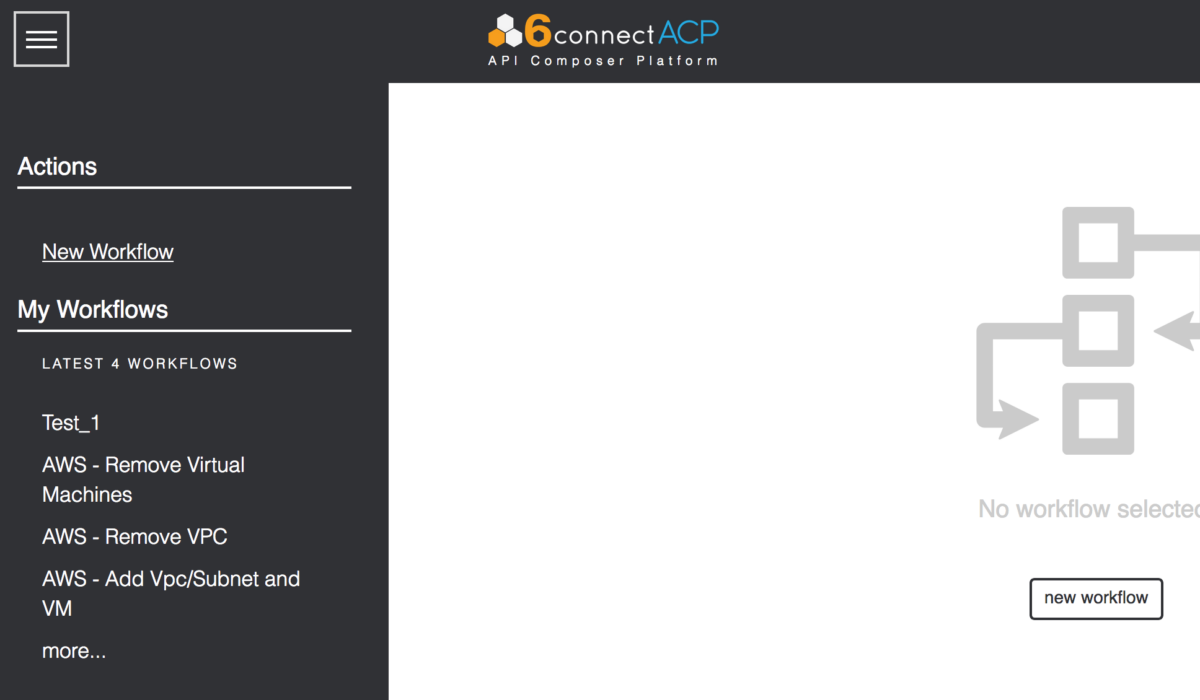
With the API data sources defined, 6connect ACP will then permit you to create a new workflow or open/import an existing one.
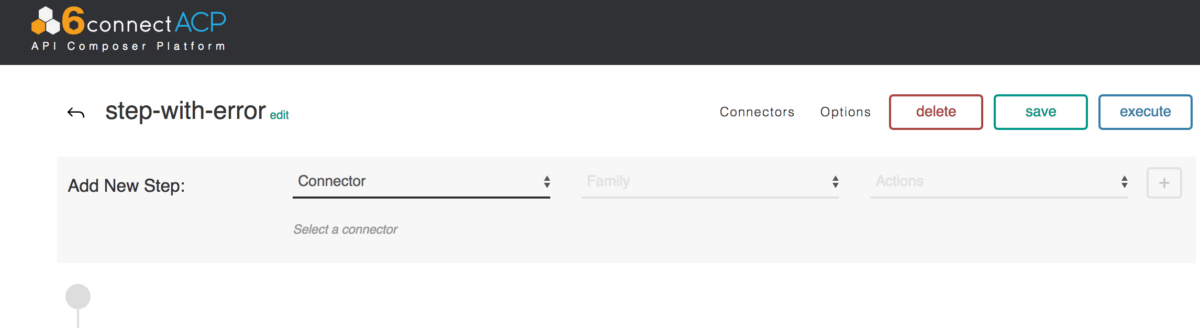
Before we get into the workflow – a quick tour of the upper right menu buttons.
- Connectors – where you specify the API data sources
- Options – One key feature is “Enable Rollback” – if enabled, this provides a powerful tool to minimizing hassles to undo changes under an error condition. If a workflow is executed and it encounters an error, the workflow will stop and notify the user. If this option is enabled, the workflow will notify the user of the error, but then proceed to “roll back” each step of the workflow. If you were going to script this – it would not be as easy as a checkbox.
- Delete – deletes the selected workflow
- Save – Save the selected workflow
- Execute – Execute the selected workflow. If there are prompts for the user, they will be generated in a simple webform in the GUI.
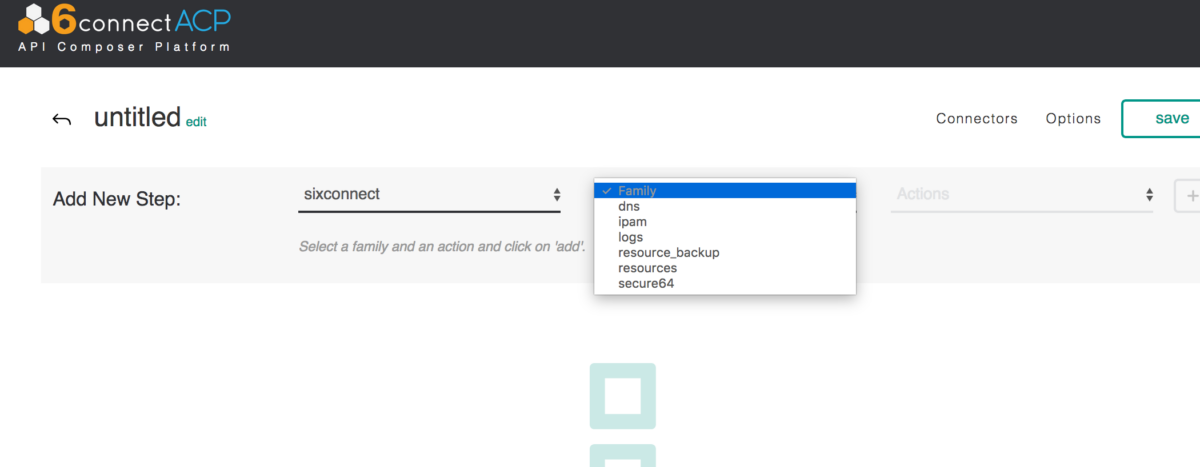
If creating a new workflow is selected, the user will then select the Connector from the dropdown (as defined previously).
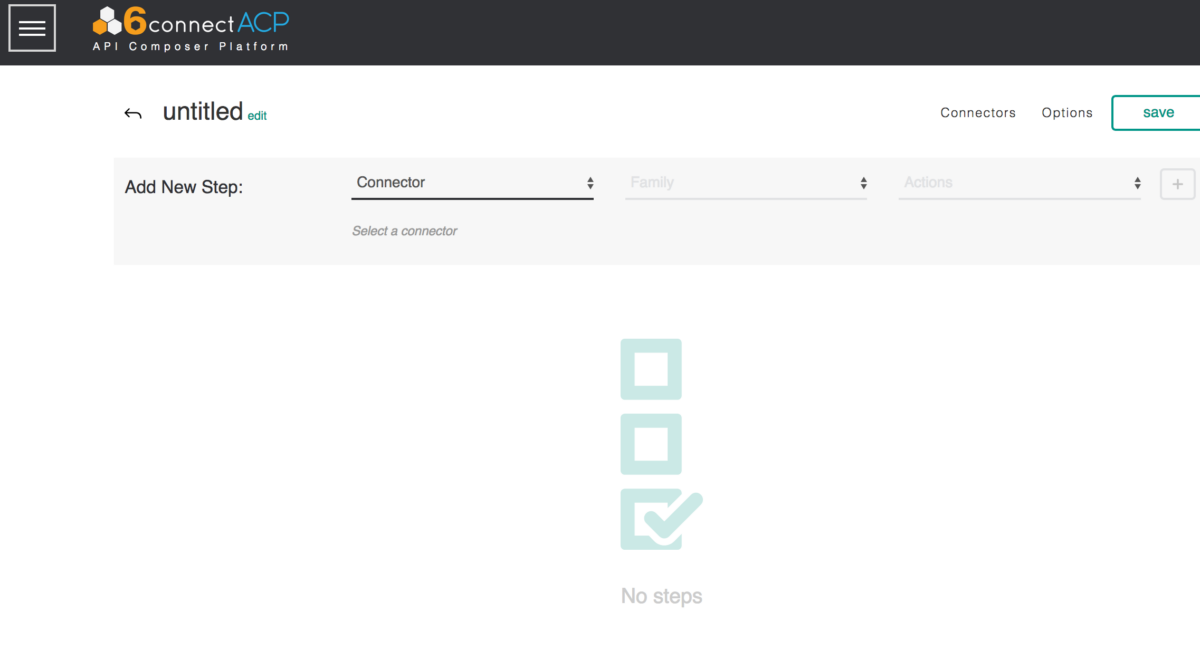
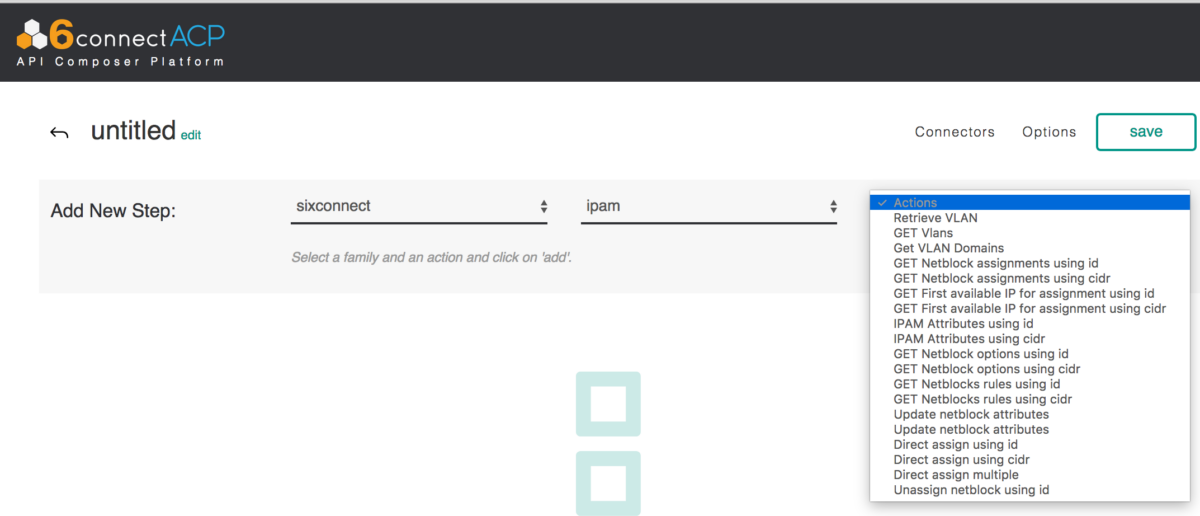
With the API Family selected, then the Actions dropdown menu can be used to select individual calls.
When selecting the calls to use in this step, it should be noted that for large data sources and API families, browsing extensive lists can be challenging. We recommend using the automatic search/filter functionalities. This way as you type in the dropdown menu, you will see a constantly filtering list of calls to select from.
Once you have added your first Step, you can then expand it to show the properties of each step.
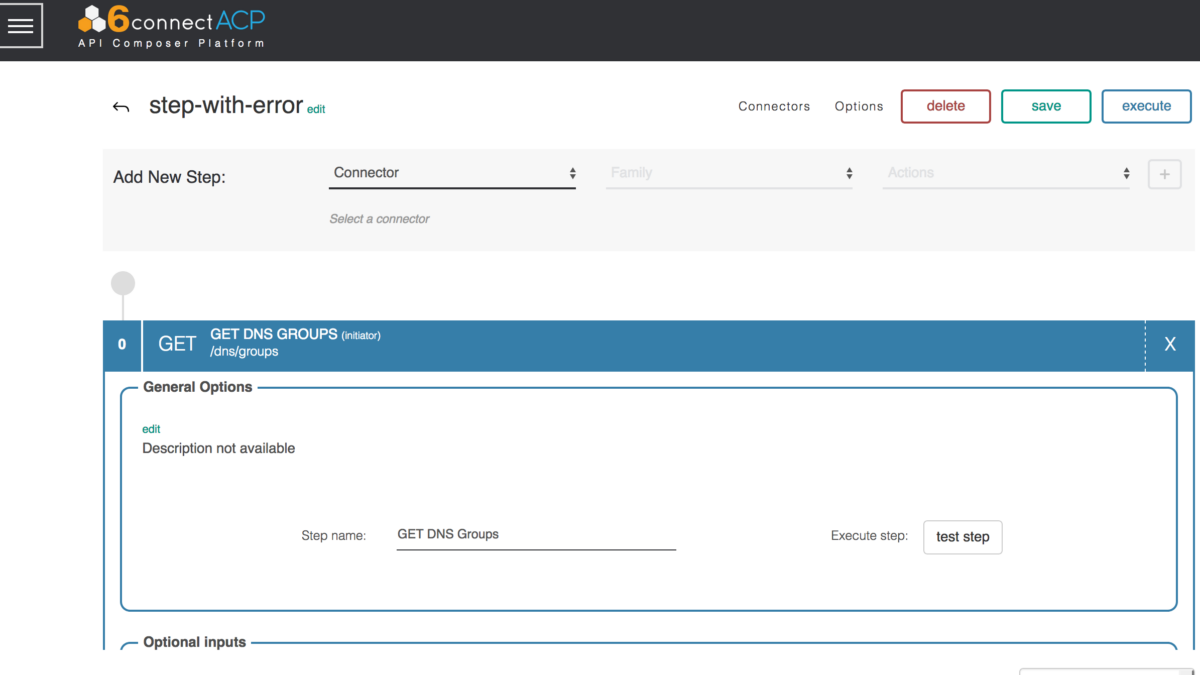
As you go per section, you can also see some more advanced capabilities depending on what you want your workflow to do.
General Options – usually just a way to customize the step name and do a test execution of the step to make sure values/forms work as they should without doing an actual call.
Optional Inputs – depending on the API call, there will be various optional parameters for the specific call.
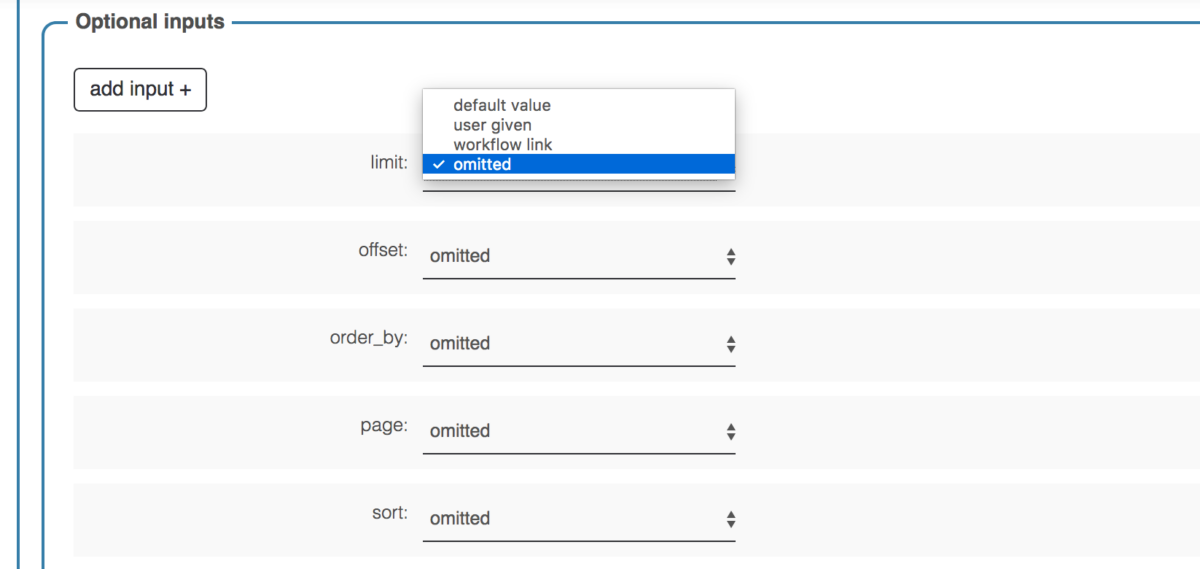
In the call above, the dropdown menu shows 4 optional inputs for this call.
- Default value – Gives the workflow creator a chance to populate the field value to use by default
- User Given – Prompts the user who runs the workflow to provide the field value, the field is stored in the variable value specified by the workflow creator. This variable value can also be used again later in the workflow.
- Workflow link – You can specify a direct link to another ACP workflow value or call to populate the value
- Omitted – the parameter/value is ignored
Sub Steps – this area allows the workflow creator to specify a new call from within the current call.
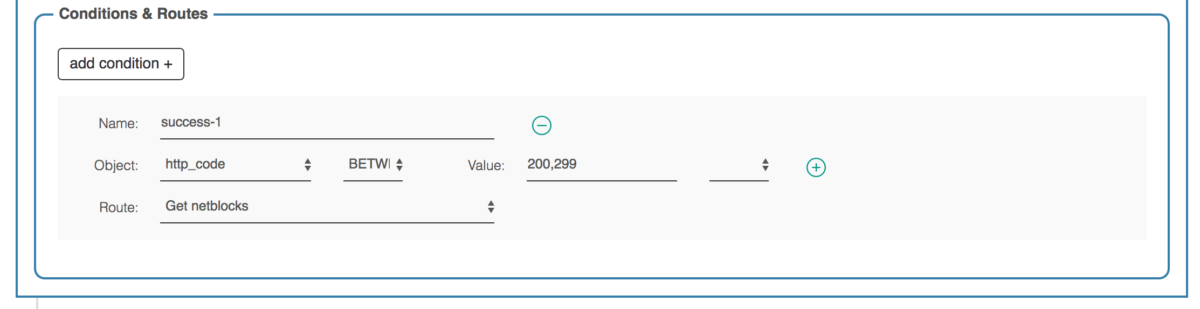
Conditions and Rules – this area provides additional customization so that your workflow can behave the way you think it should. For example, if you have different/custom HTTP codes, you could instruct the workflow to take different actions depending on whether the call gets a “201 Success” or “299 Success”. It is here that you would then link the initiator to the next API request.
From here you would document the next API call in the sequence and follow the same path as above with each section.
Once completed with your API call sequence, you should arrive at the Output section.
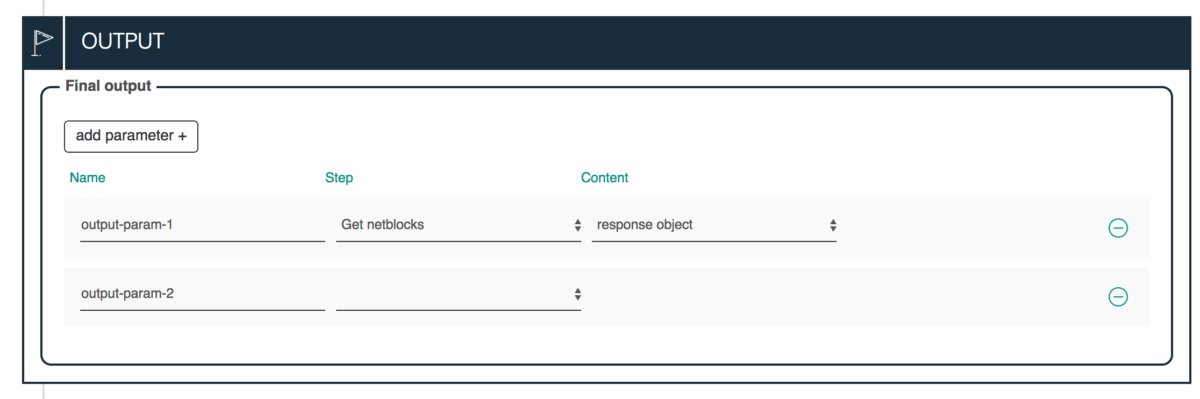
Here you can define the final output of the workflow
We hope you like what we are cooking up in R&D this year. While we do have some customers using a Preview version of 6connect ACP, if you want to see a demo or talk with one of our engineers about 6connect ACP and see how it can help your automation efforts, email us at info@6connect.com or Join the beta program.